MASTERING HARD SURFACE MODELING IN MAYA
Make Progress, Gain Confidence, and Level Up Your Portfolio!
Term Dates: 9/28/20 – 12/6/20
Normal Price: $1098
Sale Price: $748
BONUS ($214 Value)
Portfolio Review & Action Plan
Early Bird Price: $672
Start your Risk Free Trial
Over 6 Chapters!
Split Payment Option
3 Monthly Payments of $224
On Demand Option Available:
WHY YOU NEED THIS COURSE
Gain Confidence in your 3D Art.
Slay those old 3d Modeling demons from the past while making meaningful progress with your 3d modeling. This course was built for you to progress and grow as an artist.
Learn Quickly without the Frustration.
Learn all the 3d modeling tools, tips and tricks to create the most complex shapes with a simple workflow built with efficiency in mind. You will become a certified 3d Modeling Beast in just 10 weeks!
The Right Learning Enviroment.
Being able to learn not only relies in the educational material but being placed in the right environment. Learn as a group, share your work and connect with other 3d modeling beasts with access to my exclusive class group. Stay motivated and on top of your assignments with my action packed QnA webinars each week.
Level Up You Portfolio.
In a short 10 weeks, you will create a beautiful hard surface model with clean topology that will show your 3d Modeling proficiency to future studios and employers.
HOW IT WORKS
Live Q&A Webinars
Live online classes will be streamed once a week going over the weeks assignments. Ask questions about your project and learn in a group setting.
Video Lectures
On demand video lectures where you can watch on any device. Over 20 hours of video content with FREE lifetime updates.
Portfolio
Project based assignments will be given each week. At the end of the course, you will have a polished 3d model to add to your portfolio.
Member's Only Group
This is where you get to post updates with your work, hang out with JL, and connect with other artists.
Instructor Feedback
Each student has the option to receive individual feedback on their project.
Money Back Gurantee
If you are not 100% satisfied with the course within the first two weeks, you will receive a full refund, no questions asked.

WEEK 1: BLOCKOUT
After an introduction to all my favorite 3d modeling tools, interface options and hot key setups you will tackle your first 3d modeling challenge, creating a blockout of your model.
You will establish all your primary forms with basic primitives to make sure all parts will fit together before committing to any final shapes. The blockout will act as a roadmap for the rest of your project.
Learning Outcomes:
- Working knowledge of modeling, transform and selection tools.
- Setting up blueprints in your viewports to aid in modeling.
- Establishing primary forms.
- Planning how to build a complex model.
WEEK 2: RIMS & TIRES
You’ll move on from the blockout stage to creating your first set of finalized parts. You will learn how to use radial symmetry setups to create the rim. You will also learn how to breakdown a complex shape like a tire, into a simple repeatable pattern and achieve it final shape by using Maya’s powerful deformers.
Learning Outcomes:
- Create radial symmetry setups that will allow you to work on a small section of your model while allowing you to view the end result.
- Breaking down complex shapes into a simple repeatable pattern.
- Using deformers to quickly build a complex shape.


WEEK 3: FORK & FRAME
You will build off the existing blockout to create the final version of the fork and frame. You will learn how to plan for intersecting components, boolean pieces together and clean up your edgeflow to achieve a great final result.
Learning Outcomes:
- Planning topology prior to booleans operations to create cleaner topology with less clean up work.
- Combining simple objects using booleans to create complex shapes quickly.
- Adding secondary details.
WEEK 4: HANDLEBAR & STEM
You will use simple primitives in conjunction with booleans to carve out a complex shape like the stem. You will also build the handlebars with some of the same workflows your created the frame with.
Learning Outcomes:
- Creating both symmetrical and asymmetrical details.
- Planning topology prior to booleans operations to create cleaner topology with less clean up work.
- Using booleans to quickly build a complex shape.
- Modeling in object space.


WEEK 5: BRAKE LEVER
You will learn how to create models that are both asymmetrical and highly detailed.
Learning Outcomes:
- How to build asymmetrical components separately and attach them toward the end of the modeling process.
- Creating radial details.
- Quickly create different variations of models by duplicating and detaching components.
- Create a fully functional hard surface asset with moving parts.
WEEK 6: SEAT ASSEMBLY
You will be introduced to organic modeling to create the seat support along with the seat cushion. This is a challenging piece that will blend both organic and hard surface components.
Learning Outcomes:
- Learn organic modeling tools, workflows and best practices.
- How to avoid pinching on curved surfaces.
- How to create a model with both organic and hard surface components.


WEEK 7: CRANKSET & PEDALS
In this lesson, radial symmetry and precision rule the day. You will create all the elements of the power train for your bike.
Learning Outcomes:
- Creating advanced radial symmetry setups.
- Creating repeatable patterns with the help of instances and duplicate special.
- Creating groups and editing pivots to be able to transform large numbers of separate pieces with precision.
- Create a fully functional hard surface asset with moving parts.
WEEK 8: REAR BRAKES & HUBS
You’ll wrap up the modeling phase by creating the rear brakes and hubs that connect the rims to the frame. You will also create all the smaller details of the break system including the yoke and break cables.
Learning Outcomes:
- Extruding along a curve to create cable details.
- Extracting curves from geometry to easily build details.
- Scene cleanup and optimization.


WEEK 9: RENDERING WITH ARNOLD
You will learn the rendering basics of working with Arnold to create beautiful renders of your bike.
Learning Outcomes:
- Understand Arnold’s render settings to create efficient renders.
- Light a scene with 3 point lighting setup.
- Create and modify Arnold materials.
- Learn how to light link in Maya for have more control over your lights and shadows.
- Create render passes using Arnold’s AOVs system.
- Use HDR images to create an outdoor lighting setup.
- Composite your render layers to have more control over your final image.
WEEK 10: FINAL SUBMISSIONS
This is where all your hard work comes together and you show the world that your an official 3d modeling beast! You will be sharing your renders inside our class group as well as encouraged to post on social media and on your portfolio.

MEMBER’S ONLY GROUP
Post your work. Get Feedback. Connect with others.

LIVE QnA WEBINARS
Ask questions. Learn with others. Have fun!

“One of the best educational experiences I have EVER had, hands down”
Jonathon, 3d Artist
“JL has a way of helping people past specific challenges”
Chaplain, VFX Artist
“It’s turned me into a 3D Modeling Beast!”
Sian, Multimedia Designer

“It really gave me the foundation to finally start modelling at a much higher level with professional standards. “
I had one semester of 3D modeling and animation in a Graphic Design course at the University, and I spent the last few years trying to create 3d models on my own. I didn’t know how to use the modeling tools properly, it took me days to model simple assets, and I was having issues fixing them.
I have been watching JL’s YouTube videos for a couple of months and I really liked his teaching style. When I saw he was going to offer this 3d Modeling course and saw how it was structured, it really caught my attention! I couldn’t be more pleased about making the decision of joining the course. JL Mussi is really didactic, the course is really well structured, and it really gave me the foundation to finally start modelling at a much higher level with professional standards.
Saulo, Character Animator
SAULO’S WORK BEFORE

SAULO’S WORK AFTER


“I wasn’t confident with my 3D modeling”
I watched every 3d modeling tutorial I could get my hands on. I would follow along, miss one step, then spend hours online researching the answer. The progress was so slow that I almost gave up.
I wish I had a knowledgeable instructor by my side to help me thru some painful sticking points. I created the 3d modeling course that I wish I had back when I was learning.
COURSE DETAILS
I will take you the entire process of creating a high end model of a BMX bike. This course will teach students how to 3d model using Subdivision Surfaces with a focus on clean topology.
The course will start with the basics of 3D modeling and how to set up your project. Then you will learn how to properly Blockout your model. From there students will learn a variety of different techniques to create each part of the bike. Lastly, you will learn how to create a polished beauty render using Arnold.
- Class Dates: 9/28/20 – 12/6/20
- Live Q&A Sessions: Fridays 5pm Eastern. Attendance is not mandatory. Sessions will be recorded for easy viewing later.
- Software Requirement: Autodesk Maya 2016 or newer.
- Prerequisites: Basic knowledge of Maya is Recommended.
ABOUT JL
I have been doing artwork for as long as I can remember. I have been a professional 3D artist for well over a decade with a focus on 3D Modeling, Texturing and Rendering.
I have a passion of sharing my skills and workflows with others. I make 3D art tutorials with software application including Maya, Zbrush and Substance Painter.
Check out my portfolio below.

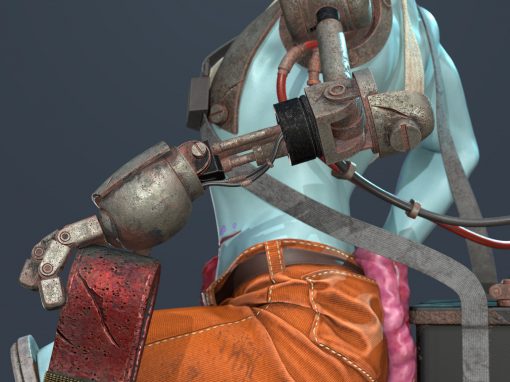
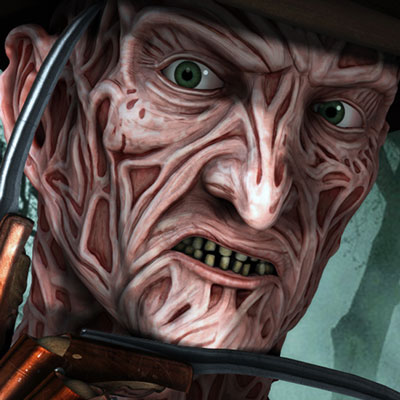
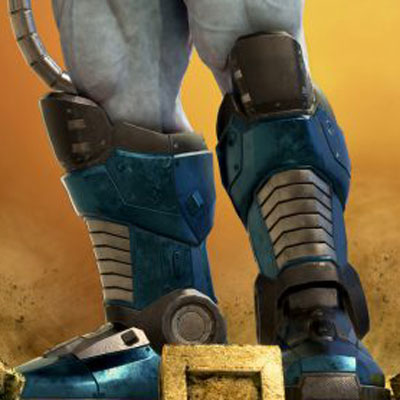
INSTRUCTOR GALLERY


MASTERING HARD SURFACE MODELING IN MAYA
Make Progress, Gain Confidence, and Level Up Your Portfolio!
Normal Price: $1098
Sale Price: $748
Early Bird Price: $672
BONUS ($214 Value)
Portfolio Review & Action Plan
Single Payment Option (Save $24)
1 Payment of $648
Split Payment Option
3 Monthly Payments of $224
On Demand Option Available:
QUESTIONS?